

Table of Contents
- What You'll Need Before You Start
- Step 1: Get the Coffee-to-Water Ratio Right
- Step 2: Choose the Best Grind Size for Your Drip Coffee Maker
- Step 3: Use Filtered Water at the Right Temperature
- Step 4: Master the Bloom Phase for Better Extraction
- Step 5: How to Clean a Drip Coffee Maker Properly
- Step 6: Start with Fresh, Quality Beans to Brew Better Drip Coffee
- Common Mistakes to Avoid
- Frequently Asked Questions
Last Updated: September 28, 2026
What You'll Need Before You Start
To brew better drip coffee, you need whole beans, filtered water, a drip coffee maker, and a few simple tools. Most home brewers overlook the basics and wonder why their coffee tastes flat or bitter.
Small details matter more than expensive equipment. A kitchen scale, a burr grinder, and a thermometer transform your morning cup.
Here's what to gather before you start:
- Coffee beans, fresh, whole bean is best
- Filtered water, tap water often contains minerals that interfere with extraction
- Drip coffee maker, any standard auto-drip machine works
- Kitchen scale, measures coffee and water precisely
- Burr grinder, creates consistent grind size
- Thermometer (optional), ensures proper water temperature
- Measuring spoon, if you don't have a scale
Step 1: Get the Coffee-to-Water Ratio Right
The coffee-to-water ratio is the foundation of great drip coffee. Most home brewers use too much water and not enough coffee, producing weak, watery coffee.
The golden ratio for drip coffee is 1 part coffee to 16 parts water. In practical terms, that's about 1 to 2 tablespoons of ground coffee per 6 ounces of water. A kitchen scale makes this exact: use 0.6 ounces of coffee per 10 ounces of water.
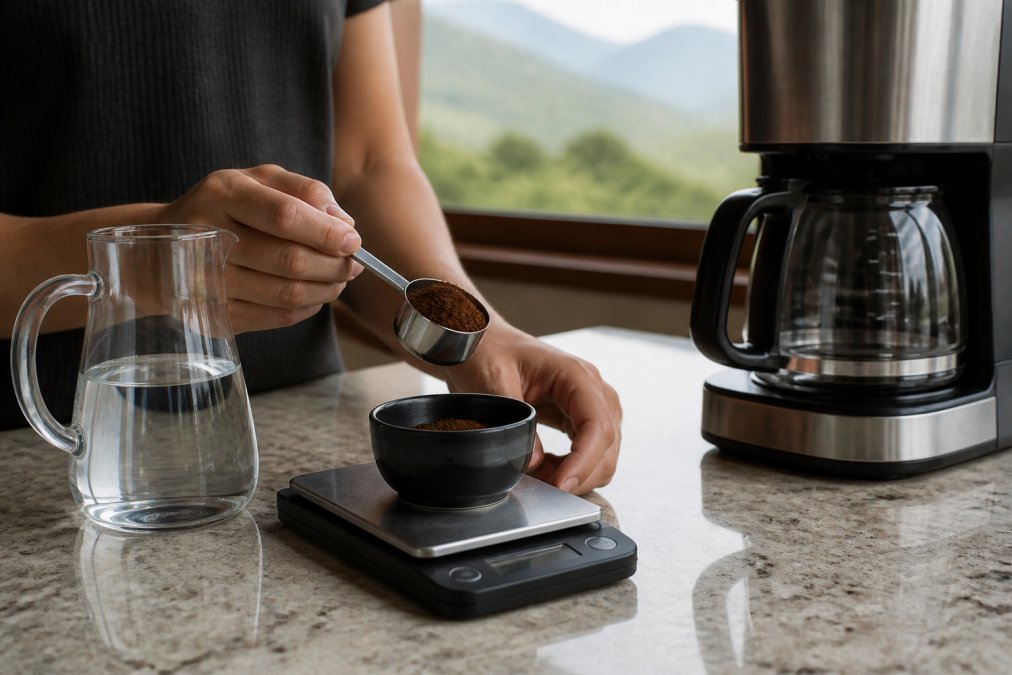
Why this ratio works:
- 1:16 ratio produces balanced flavor with good body and acidity
- Too much water (1:20 or higher) creates sour, under-extracted coffee
- Too little water (1:12 or lower) produces bitter, over-extracted coffee
Start with the 1:16 ratio and adjust to your taste. If your coffee tastes sour, add more coffee; if bitter, reduce it slightly.
Most people eyeball measurements, creating inconsistent results. A scale under $15 eliminates this problem.
Step 2: Choose the Best Grind Size for Your Drip Coffee Maker
Grind size controls how fast water flows through the coffee grounds and how much flavor is extracted. The best grind size for drip coffee is medium, roughly the texture of sand.
Why medium grind matters:
- Too coarse (like breadcrumbs), water passes through too fast, coffee tastes sour and weak
- Too fine (like flour), water moves too slowly, coffee tastes bitter and harsh
- Medium (like sand), water extracts flavor evenly, coffee tastes balanced
A burr grinder gives consistent grind size. Blade grinders create uneven particles, causing some grounds to over-extract while others under-extract. Burr grinders cost $30-$100 and are worth the investment.
Here's how to test your grind size:
- Brew a pot and taste it
- If it's sour, your grind is too coarse, adjust finer
- If it's bitter, your grind is too fine, adjust coarser
- Once you find the sweet spot, keep that setting
Step 3: Use Filtered Water at the Right Temperature
Water quality and temperature control whether your coffee tastes clean or harsh. Water hardness, mineral content, is the most overlooked variable in drip brewing.
Water Temperature: The Baseline
The ideal water temperature for brewing drip coffee is 195 to 205 degrees Fahrenheit. Most auto-drip machines heat water to this range automatically, but older machines sometimes run cooler. If your coffee tastes weak or sour, low water temperature is often the culprit.
This range allows balanced extraction: below 195°F tastes sour; above 205°F tastes bitter.
If your coffee tastes weak or sour, check water temperature with a thermometer. Below 190°F suggests descaling is needed.
Water Hardness: The Hidden Variable
Water hardness measures dissolved minerals (calcium and magnesium) in ppm or gpg, affecting extraction and machine longevity.
Hard water (above 120 ppm): Minerals slow extraction and accumulate as scale, reducing heating efficiency. Coffee tastes harsh or bitter; machines brew slower and cooler over time.
Soft water (below 50 ppm): Lacks minerals to stabilize flavor. Water extracts too aggressively; coffee tastes thin or sour.
Balanced water (50-120 ppm): Contains enough minerals for clean, balanced flavor while minimizing scale.
How to Know Your Water Hardness
Test hardness three ways: contact your water utility for a Consumer Confidence Report, use test strips ($5-$15), or observe scale buildup on kettles and showerheads.
Correcting Water Hardness for Better Drip Coffee
If your water is hard: Use a pitcher filter to reduce minerals by 50-70%, and descale your machine monthly. Whole-home softeners ($500-$2,000) are an option if filters don't improve taste.
If your water is soft: Use bottled mineral water (1 part mineral to 3 parts tap) to restore balance, or select bright, acidic bean origins.
If your water is balanced: Use a pitcher filter for chlorine and sediment; mineral content is already optimal.
The Practical Impact on Your Morning Cup
Hard water slows extraction, reduces temperature, and tastes harsh. If your coffee tastes off despite correct ratio and grind, test hardness (5 minutes, free). A pitcher filter ($10) transforms your cup.
Step 4: Master the Bloom Phase for Better Extraction
The bloom phase is a 30-second pause at the start of brewing that most auto-drip machines skip. Manually triggering bloom improves extraction significantly.
What Happens During Bloom
Hot water releases trapped CO₂ from roasting. If water rushes through before bloom, CO₂ bubbles block even water flow, creating uneven extraction.
Why Auto-Drip Machines Don't Have Built-In Bloom
Most auto-drip machines spray continuously with no pause function, prioritizing speed over extraction. You can work around this manually.
How to Manually Bloom in Your Auto-Drip Machine
You can trigger bloom manually by interrupting the brew cycle. Here's the step-by-step process:
Before brewing:
- Load your filter and ground coffee into the machine as usual
- Fill the water reservoir with your filtered water
- Start the brew cycle
During the first 30 seconds: 4. As soon as water begins spraying onto the grounds (you'll see it start to drip into the carafe), pause the machine by removing the carafe 5. This stops the flow and allows water to soak the grounds 6. Wait 30 seconds while the grounds bloom (you may see small bubbles or hear a faint hissing sound as CO₂ escapes) 7. Replace the carafe and resume the brew cycle
The Taste Difference
Coffee brewed with bloom tastes cleaner, more balanced, smoother, and more flavorful.
Machine-Specific Considerations
Machines with pause-and-serve valves bloom perfectly (pause 30 seconds). Machines without valves may drip (pause 20-25 seconds). Premium machines like Technivorm Moccamaster bloom automatically.
Bloom + Ratio + Grind = Extraction Control
Ratio, grind size, and bloom must align: ratio controls flavor availability, grind controls water flow, bloom controls even extraction. All three together produce consistent, excellent coffee.
When to Skip Bloom
Bloom is optional if:
- Your coffee already tastes balanced and clean
- You're in a hurry and willing to accept slightly less flavor clarity
- Your machine has a built-in bloom cycle
Bloom is essential if:
- Your coffee tastes sour or weak
- You're using fresh, recently roasted beans (which contain more CO₂)
- You want to maximize flavor from high-quality, single-origin coffee
Step 5: How to Clean a Drip Coffee Maker Properly
Scale buildup and old residue create stale, bitter flavor. Regular cleaning keeps your machine performing at its best.
Clean your coffee maker two ways:
Daily cleaning:
- Empty the carafe and filter basket after brewing
- Rinse the carafe with hot water
- Wipe the showerhead (the part that sprays water) with a damp cloth
- Remove any coffee grounds from the filter basket
Monthly descaling:
- Fill the water reservoir with a 1:1 mixture of white vinegar and water
- Run a full brew cycle (don't add coffee or a filter)
- Let the vinegar solution sit in the carafe for 15 minutes
- Run two full cycles of plain filtered water to rinse completely
- Repeat the rinse cycles until the vinegar smell is gone
Step 6: Start with Fresh, Quality Beans to Brew Better Drip Coffee
Fresh beans are non-negotiable. Stale coffee tastes flat regardless of technique. Quality beans have more flavor to extract.
Common Mistakes to Avoid
Most home brewers make the same mistakes repeatedly. Fixing these transforms your daily cup.
| Mistake | Fix | Impact |
|---|---|---|
| Stale beans | Use beans within 4 weeks of roast date | Noticeably better flavor |
| Fine grind | Switch to medium grind | Eliminates bitterness |
| Tap water | Use filtered water | Cleaner, smoother taste |
| No bloom | Pause 30 seconds at start | More balanced extraction |
| Dirty machine | Descale monthly | Better temperature, fresher taste |
| Wrong ratio | Use 1:16 coffee to water | Consistent, balanced flavor |
Frequently Asked Questions
What is the best coffee-to-water ratio for drip coffee?
The golden ratio is 1 to 16, that's 1 gram of coffee to 16 grams of water. For a standard cup, use 1 to 2 tablespoons of ground coffee per 6 ounces of water. This ratio produces balanced extraction with clean flavor and proper body. Start here, then adjust slightly if you prefer stronger or lighter coffee. Tinto Coffee Bag's brew guide recommends this ratio for drip and auto-brew machines.
How does water temperature affect drip coffee flavor?
Water temperature controls extraction speed. Brew at 195-205°F for optimal flavor. Too cold (under 195°F) and extraction is slow, your coffee tastes sour and weak. Too hot (over 205°F) and extraction happens too fast, you get bitter, over-extracted coffee with harsh acidity. The sweet spot pulls out the right amount of soluble solids, highlighting the coffee's natural sweetness and body without burning the grounds.
What grind size works best for a drip coffee maker?
Use a standard (medium) grind for automatic drip machines. It looks like sand and allows water to flow through in 4-6 minutes, hitting the ideal brew time for full extraction. Too fine (espresso grind) and water moves too slowly, causing over-extraction and bitterness. Too coarse and water rushes through, leaving you with sour, under-extracted coffee. A burr grinder gives you consistency; blade grinders produce uneven particles that brew unevenly.
How often should I clean my drip coffee maker?
Clean the carafe and filter basket after every brew with hot water. Deep clean (descale) your machine every 1-3 months depending on water hardness. Hard water builds scale inside faster. To descale, run a 1:1 mixture of white vinegar and water through the brew cycle, then run clean water through twice to rinse. Scale buildup blocks water flow, slowing extraction and creating stale-tasting coffee. Regular maintenance keeps your machine working and your coffee tasting fresh.